Manage Rotors
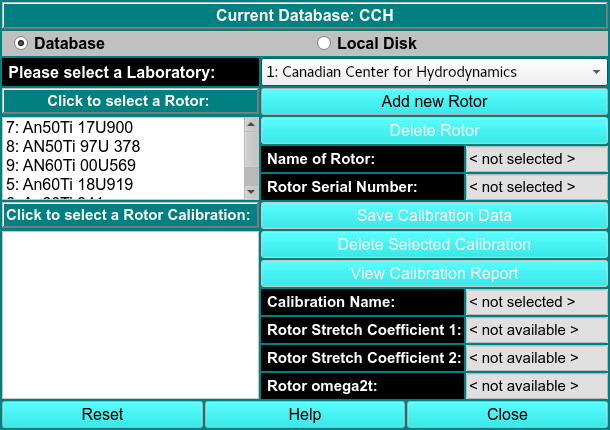
Using this window, you can manage rotor information. Make sure that you are in the correct database.
\(\textbf{Select a Laboratory}\) Select the appropriate lab in the drop-down box.
\(\textbf{Click to Select a Rotor}\) Select the rotor that is being used.
\(\textbf{Select Rotor Calibration}\) Select the correct rotor calibration profile. Rotor calibrations are sorted in reverse order by data. The most recent and best choice is at the top.
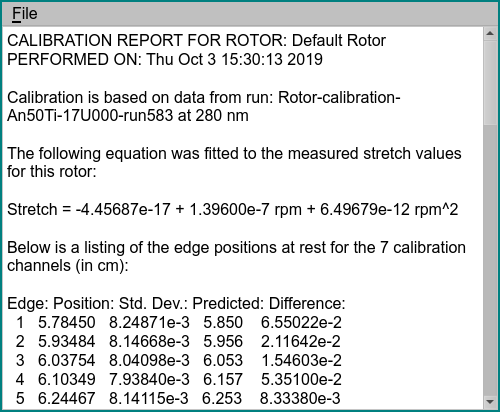
\(\textbf{View Calibration Report}\) Click here to view the calibration report associated with the selected rotor.
You can come to this window from Utilites:Rotor Calibration, allowing you to associate the calibration you collected with an rotor. Click on the rotor you would like to associate, and click on \(\textbf{Save Calibration Data}\). This action is only possible for administrators.
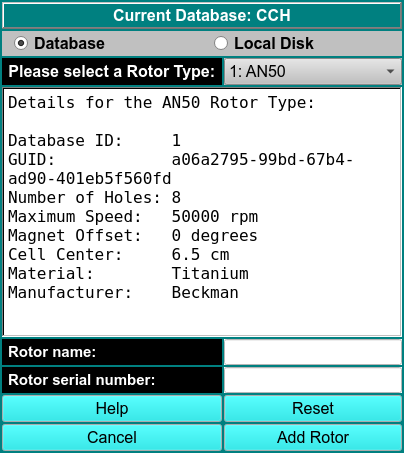
If you are an administrator and would like to add a new rotor, click on \(\textbf{Add New Rotor}\). In the dialog, select the rotor type (AN60, AN50, or Simulation) and add the appropriate details into \(\textbf{Rotor Name}\) and \(\textbf{Rotor Serial Number}\). All other details are generated automatically.